 Gradients make effective simple backgrounds and look good in shapes. It’s easy to create gradients in PowerPoint. PowerPoint 2007 and later offer lots of options. Unfortunately, PowerPoint 2003 and earlier versions only allow two colors in a gradient and gives you little control over where the colors change, so I show you a trick to get more interesting gradients.
While you can create gradients using only color variations, you can also create transparency gradients. I explain how in “Use transparency gradients.”
PowerPoint 2013 and later
In PowerPoint 2013 and later, you specify the gradient in a task pane on the right, instead of in a dialog box as in earlier versions. Here are the steps:
- Draw a shape on a slide.
- Right-click the shape and choose Format Shape.
- Expand the Fill category and choose Gradient Fill.
- From the Type drop-down list, choose a type, such as Linear or Radial.
- Use either the Direction or Angle controls to set the direction of the gradient.
- To add a stop, click on the Gradient Stops bar. To remove one, drag it off the bar.
- With Stop 1 selected, click the Color drop-down list and choose a color. Then specify a Stop Position and a Transparency. You can drag the gradient marker along the bar to specify its position.
- Repeat for each stop.
- Click Close.
PowerPoint 2007 and 2010
PowerPoint 2007 and 2010 let you create gradients with up to 10 colors. Follow these steps:
- Draw a shape on a slide.
- Right-click the shape and choose Format Shape. In the Fill category, choose Gradient Fill.
- From the Type drop-down list, choose a type, such as Linear or Radial.
- Use either the Direction or Angle controls to set the direction of the gradient.
- Click Add to add stops, or choose a stop from the Stops drop-down list, and click Remove,
- With Stop 1 displayed (2007) or selected (2010), click the Color drop-down list and choose a color. Then specify a Stop Position and a Transparency. In PowerPoint 2010, you can drag the gradient marker to specify its position.
- Repeat for each stop.
- Click Close.
Note that if you drag the Format Shape dialog box off the shape that you drew, you can see the results as you make changes. You can use the same technique for backgrounds. Right-click the background of a slide or in the slide master and choose Format Background.
PowerPoint 2003
In 2003, you can use an easy trick to make multi-color gradients and add control over where the colors change as well.
You can combine rectangles, each with a slightly different gradient to create the effect of one larger, multi-colored gradient. For a seamless look, each rectangle must start with the same color as the ending color of its adjacent rectangle. Follow these steps:
-
- Decide on the colors you want and where you want them to change. Remember that shading styles (such as horizontal) have two to four variants.
- Create a series of rectangle that touch each other and completely cover a slide, as shown here.

two adjacent rectangles before the effect
- Right-click the top rectangle and choose Format AutoShape. On the Colors and Lines tab, choose None from the Color drop-down list of the Line section.
- From the Color drop-down list of the Fill section, choose Fill Effects and then click the Gradient tab. Choose the Two colors option, then select the colors you want, choose a shading style and a variant. Note that a couple of the variants place the second color in the middle, so that the gradient looks like it has three sections. Remember which color fills the bottom of the rectangle.
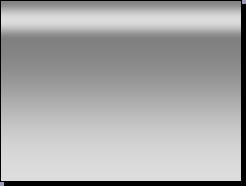
- Repeat steps 3 and 4 for the next rectangle(s), making sure that the color of the top part of the rectangle exactly matches the bottommost color of the previous rectangle. Here is one possible result, using two shades of gray. Notice that using light gray (or white) gives the impression of a highlight and thus creates a 3D effect, as if the slide has been curled at the top.

after applying multi-color gradients
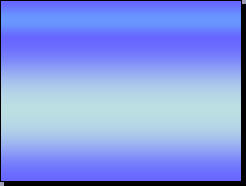
Here’s another:

another possibility
Notice that I didn’t use this feature to create backgrounds with many colors, because such a background would probably be too distracting and reduce legibility. Instead, I used it to create a number of subtle variations of color.
 Learn easy principles and techniques that designers use
“Slide Design for Non-Designers” shows you, step-by-step, how to easily get the results you want. Plus bonus theme, template, sample slides, and 5 short video tutorials to make implementing the principles easy. Updated for PowerPoint 2016/365. Learn more at http://www.ellenfinkelstein.com/pptblog/slide-design-for-non-designers/
Thank you!
I used your multi-rectangle method to create a multi-gradient in PP 2003 and it worked like a Charmed!
Merci beaucoup!
Ellen,
I feature I miss while working with gradients is that you cannot save your own presets (at least in PowerPoint 2010 or previous versions). However, it is very handy to have a PowerPoint presentation with custom gradients that you can use in new presentations (using Format Painter).
thanks a million for this helped me out perfectly on something I was trying to creat in powerpoint.
Thank you very much. I used it to create a rainbow-like circle.
Thankyou so much! I was going mental trying to make those colours something other than default blue, this is not intuitive at all. But you came to the rescue. So glad I discovered this site, I know I’ll be consulting it again and again.
Thank you. I was able to accomplish exactly what I needed.
Admiring the hard work you put into your website and detailed information you offer.
It’s nice to come across a blog every once in a while that isn’t the same outdated rehashed material.
Wonderful read! I’ve bookmarked your site and I’m including your RSS feeds to my Google account.
Tweeted today with a link to this post. Thanks, Ellen!
https://twitter.com/presentguild/status/853977703275540481
Good one.this is helpful and it works.