A great way to emphasize and draw attention to an object on a slide is to circle it.

Of course, the easy way is to insert a circle, and use the Appear or Fade entrance animation. Be sure to format the circle with no fill. I like to use a red outline and give it a weight of at least 2 pt. To format the circle, follow these steps:
- Right-click and choose Format Shape.
- In the Fill section, choose No Fill from the drop-down list.
- In the Line section, choose a red color and change the Weight.
To add the animation, select the circle, and choose Animations tab. Choose Add Effect or Add Animation> Entrance> Appear or Fade.
But wouldn’t it be more effective for the animation to circle the object? In other words, your audience would see the circle draw itself around the object. You can do this using the Wheel animation. Follow these steps:
- Insert a circle over an object. Format the object as just described so that it has no fill.
- Select the circle.
- Display the Animations tab.
- Choose Choose Add Effect or Add Animation> Entrance> Wheel.
- In the Animation task pane or Effect Options drop-down, change the number in the Spokes text box to 1 (if it is set to another value)
- Play the animation. You’ll see the circle drawn around the object.
Let’s go even further. We might want the circle to have more character. Instead, wouldn’t it be interesting if the circle was drawn with crayon or lipstick?

Here’s how I did it:
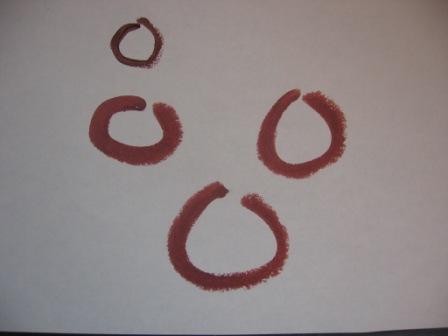
- I drew circles with lipstick on a white sheet of paper.
- I photographed them with my digital camera and uploaded the photo to my computer.
- I inserted the photo onto a slide and cropped it to the bottom circle. Use the Picture Tools Format tab> Size group> Crop button.)
- I made the background transparent. On the Picture Tools Format tab> Adjust group> Recolor drop-down> Set Transparent Color. Click on the background.
- I moved and resized the circle to encircle the object, a photo of a peacock feather.
- To add the animation, display the Animations tab.
- Choose Add Effect or Add Animation> Entrance> Wheel.
- In the Custom Animation task pane or Effect Options drop-down, change the number in the Spokes text box to 1, if necessary
- The animation always starts at the top and this meant that a little of the left end of the circle showed at the beginning of the animation. To counteract that, I rotated the circle slightly counterclockwise.
Thats a good way of drawing circle. Does this work with Microsoft Powerpoint 2010 also?
Sure does!
when i follow the steps in office 2010, the menu options are completely different so maybe it does work but certainly not as is.
I got a smooth counterclockwise animation of a circle in MS Powerpoint 2007 with these steps: 1. Holding the shift key, draw an arc (default 90 degrees). 2. Give the arc necessary color and thickness. 3. Make 3 copies of the arc. 4. Change orientation of the copies of the arc by flipping vertically or horizontally so as to obtain one arc for each quarter of the circle. 5. Approximate the arcs together to form a circle. 6. Animate the 4 arcs sequentially, counterclockwise, starting with the 270 – 360 degree arc, then 180 – 270 arc and so on.… Read more »
Yes, PowerPoint 2010 changed the animation interface – I’ve updated the post.
This is an excellent idea, although it was hard for me to follow, because I wasn’t sure where you started calculating 0 degrees.But once I had the 4 arcs in a circle, I was able to choose the upper-right one and set it to the Left Up option of the strips animation. Likewise, I set the upper-left arc to Left Down, the lower-left arc to Right Down and the lower-right arc to Right Up. I did consistently see a short pause after the first arc’s animation, but the rest went smoothly. I set the first to On Click and the… Read more »
Do you have any video of that? I’d care to find out more details.