Process diagrams are very useful for depicting (obviously) processes. Processes are a common topic in presentations and describing them with just words doesn’t work very well.
In this post, I’ll explain 2 ways to create a process diagram:
- Using SmartArt
- Creating it from scratch, to give you more variations and possibilities.
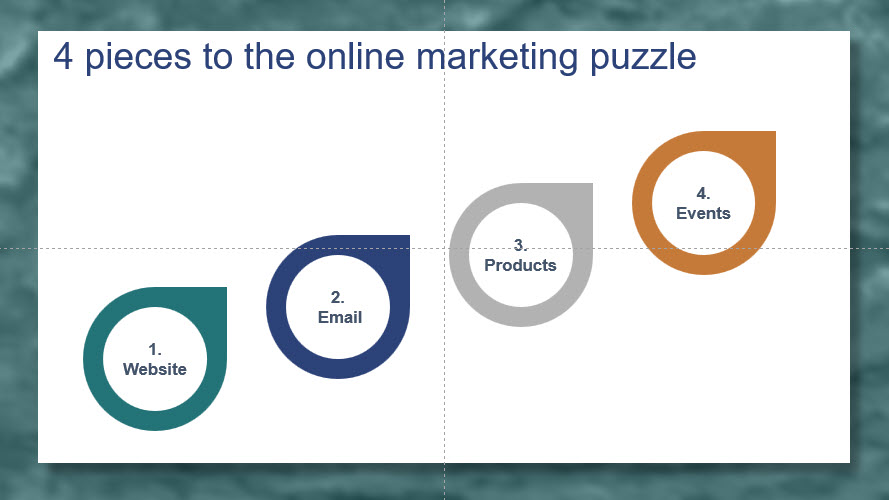
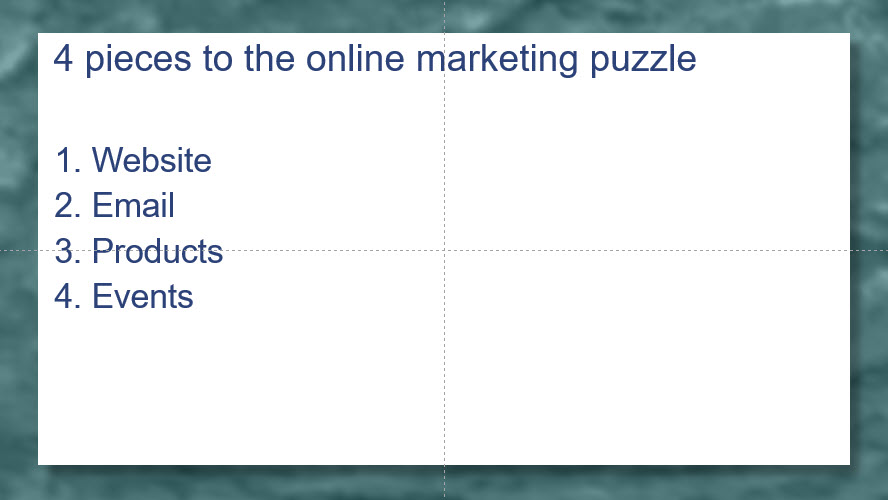
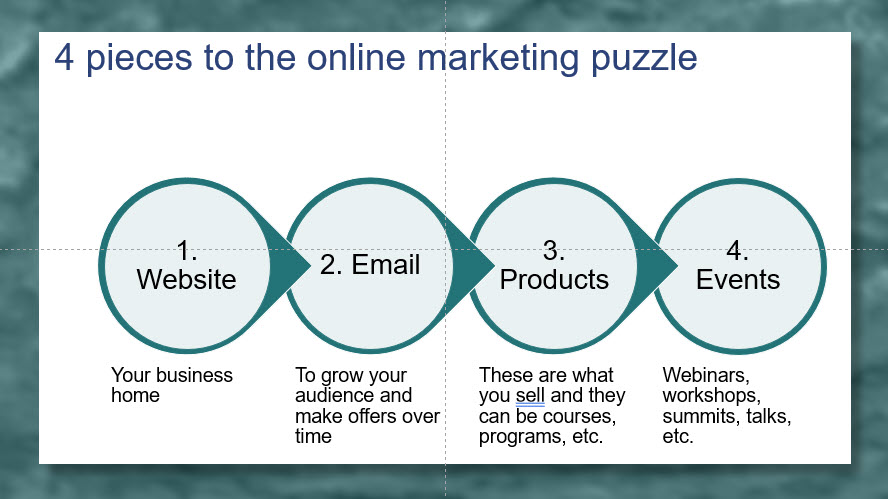
Let’s start with this slide, “4 pieces to the online marketing puzzle.” The 4 pieces are website, email, products, and events. But because I’m suggesting that this is a process, that is, you start by creating a website, then build an email list, and so on, it’s a process. You do one after the other.
A quick way would be to turn it into SmartArt, following these steps:
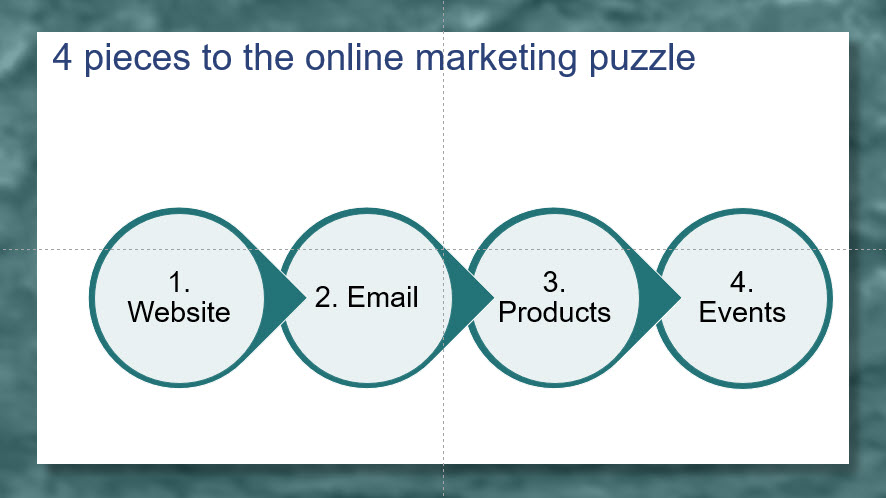
- Click inside the text area with the 4 items and on the Home tab, in the Paragraph group, choose Convert to SmartArt.
- Click More SmartArt Graphics to see all of the SmartArt layout options.
- Click the Process category and choose the Circle Process layout
- Click OK.
Notice the arrows between each circle. They are what makes this layout look like a process. You can adjust the text size and formatting inside each circle so it looks and fits better.
Adding subtext
You can add subtext by following these steps…
- Click inside the SmartArt to select it.
- Click the little arrow on the left to expand the SmartArt text area
- Click at the end of a line of text and press Enter
- Press the Tab key.
- Type the subtext
I also recommend that you remove the bullet points and even up the left side of the indented text. Here’s how:
- Click the bulleted subtext and click the Bullets button on the Home tab, in the Paragraph group.
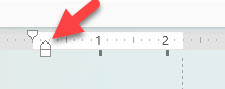
- Make sure the Ruler is displayed. If not, go to the View tab and check Ruler in the View group.
- With the cursor still in the subtext, click the lower triangle in the ruler, at the horizontal point on the ruler where the text starts, as you see at the right.
Here’s the result…
Animating the SmartArt
You could animate the SmartArt to display each item one after another, like this:
- Click inside the SmartArt.
- On the Animations tab, choose an animation such as Fade.
- On the ribbon, click Effect Options and choose One by One.
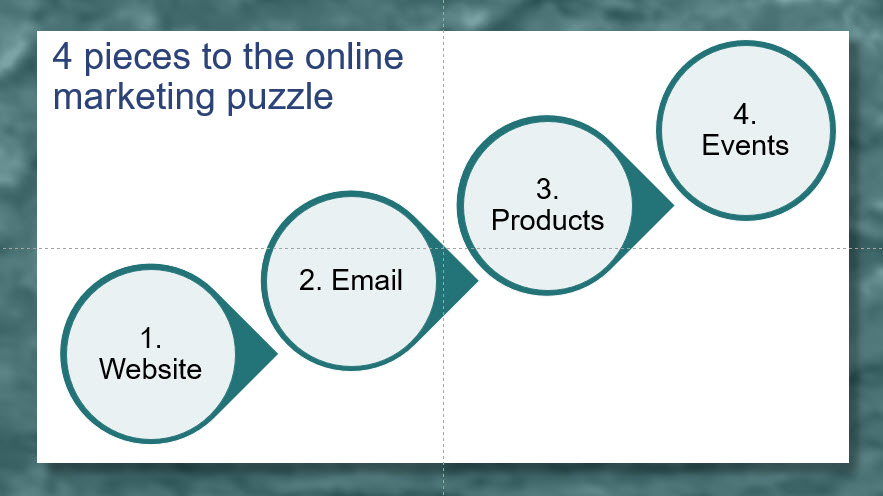
Creating a teardrop process diagram with more options
For more options, you can either ungroup the SmartArt or create it from scratch.
First, let’s ungroup what we already have.
- Right-click inside the SmartArt and choose Group>Ungroup.
- For obscure reasons not worth going into, you have to do this twice, so repeat the first step.
- Each item is now made up of a circle plus a teardrop shape. (The last one is two circles.) If you want, for ease of moving the objects, you can select the 2 objects for each item and regroup them.
Now, you can move them wherever you want. Here’s one possible result.
You might also choose to create this effect from scratch — it isn’t hard. Here are the steps:
- On the Home tab, in the Drawing group, click Shapes.
- In the Basic Shapes section, choose Teardrop. Holding down the Shift key to avoid distorting the shape, click and drag where you want it to be on your slide. Resize and position as necessary.
- From the same Shapes section, choose Oval. Again holding down the Shift key, click and drag where you want it to be, inside the teardrop.
- You’ll want to select each shape and use the Shape Format tab to format it. Choose Shape Outline, No Outline and choose Shape Fill to choose the desired fill color.
- To enter text inside the circle, select it and start typing. Resize and recolor the text as you wish.
- Of course, you can now move the items wherever you want. For ease of moving, group each item, that is, the circle and the teardrop.
Here’s an example…
Next steps
You can create a presentation containing multiple versions of this technique to add to your slide library. For example, you could have one slide with 3 items, one with 4 items, and so on. Or you could create color variations. Having sample slides like this makes your slide creation much faster!
Please leave a comment or question and share with your colleagues!